administrators > End-users interface configuration > The schema viewer
The schema viewer
Introduction
The schema viewer is an administrative tool that facilitates the graphical representation of the structure of referenced databases. It provides detailed views of entities and the relationships between them, all of which are automatically detected by the AMI ecosystem. It empowers administrators to customize how search results for an entity are presented to end-users.
Schema viewer tool overview
The search modeler interface is divided into two main parts. On the left, there is the “Catalogs” area where the referenced catalogs are listed, and their configurations can be displayed and edited. On the right, a “grid” displays the graphical representation of the selected catalog.
The catalog form
Catalogs that have been declared to the AMI ecosystem appear in a dropdown menu on the left side under “catalogs” (see Fig. 1).
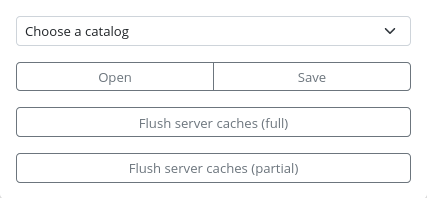
Figure 1. The catalogs form
Several features are available in this form:
- Opening a catalog view: To work on a specific catalog, an administrator must select one from the list and then click the “Open” button. This action will display the graph of the chosen catalog on the right side.
- Saving catalog configuration: Click on the save button to save the selected catalog’s configuration.
- Flush server cache (full): This triggers a full reset of the cache of this catalog by the AMI ecosystem. This is a resource-intensive operation as the AMI ecosystem will reevaluate the structure of the selected catalog from scratch to identify new tables, fields, relations, etc., to save in a cache file on the backend.
- Flush server cache (partial): This triggers a partial update of the cache of this catalog by the AMI ecosystem. It will not update the saved catalog structure, only some configuration values.
The catalog graph
Displaying a catalog
Once the catalog is selected in the catalog’s form, a graphical representation appears on the left-side grid (see Fig. 2).
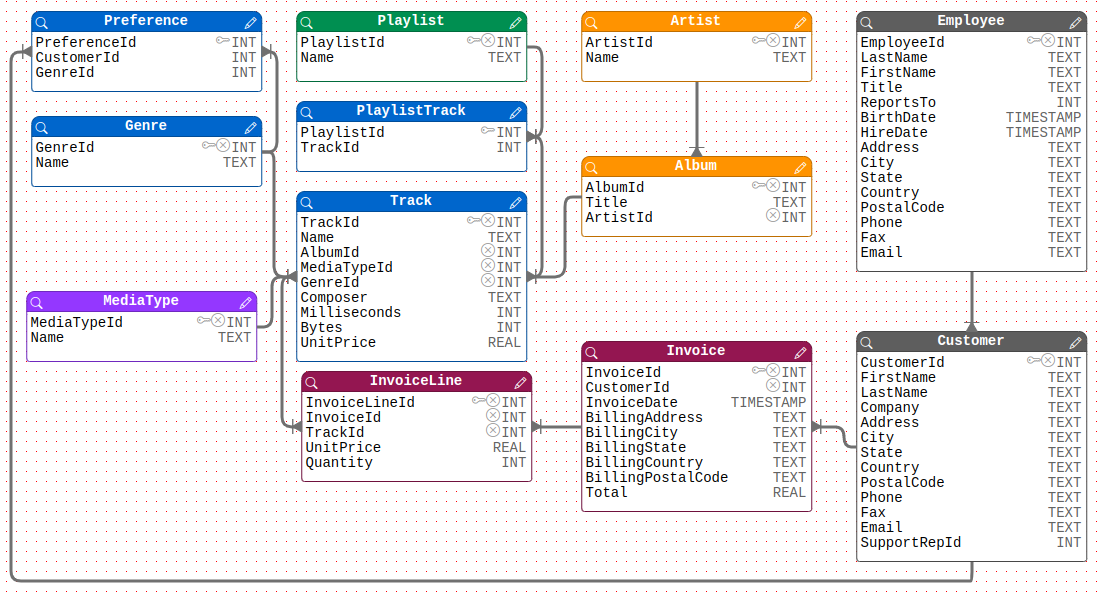
Figure 2. Displaying catalog
The graph represents the structure of the data in the referenced catalog. It is composed of “entity” boxes (also known as catalog tables), each having a list of criteria (also known as table fields). Multiple entities may have links between them, illustrating the relational model of the catalog. Administrators can visually arrange the graph by dragging and dropping boxes and links.
Configuring an entity
An entity is represented by colored boxes, containing a list of fields (see Fig. 3). Next to each field, their corresponding database type (INT, TEXT, etc.) is displayed, and optionally, icons may appear to provide information about a field’s specific characteristics:
- key icon: Indicates that the field serves as a primary key.
- cross icon: Signifies that the field is hidden from end-user search results.
- minus icon: Denotes that the field is visible only to administrators within search results.
- gear icon: Indicates that the field is hashed or encrypted.
- json icon: Suggests that the field is a JSON field.
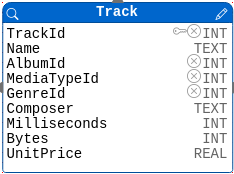
Figure 3. An entity box
Entity general options can be edited by clicking on the top-right pen icon. It opens a modal form (see Fig 4.) where general options can be configured.
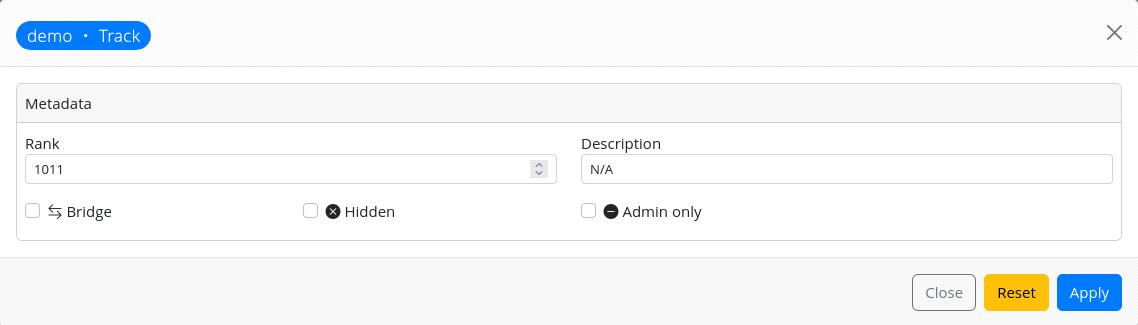
Figure 4. Entity general options
The general options are:
- rank: A number representing the “default rank” of the entity fields.
- description: A text description of the entity.
- bridge: This option allows you to define the entity as a bridge between two entities, which is useful for designing appropriate queries later on. It also provides the capability to mask the bridge from end-users, displaying only the two bridged entities as linked entities.
- hidden: Specify whether the entity should not be exposed to end-users as a linked entity.
- admin only: Determine if the entity should be exposed to administrators only.
Configuring an entity field
Field options can be configured by clicking on the field row within the entity box. This action opens a modal form (see Fig. 5) where field options can be set.
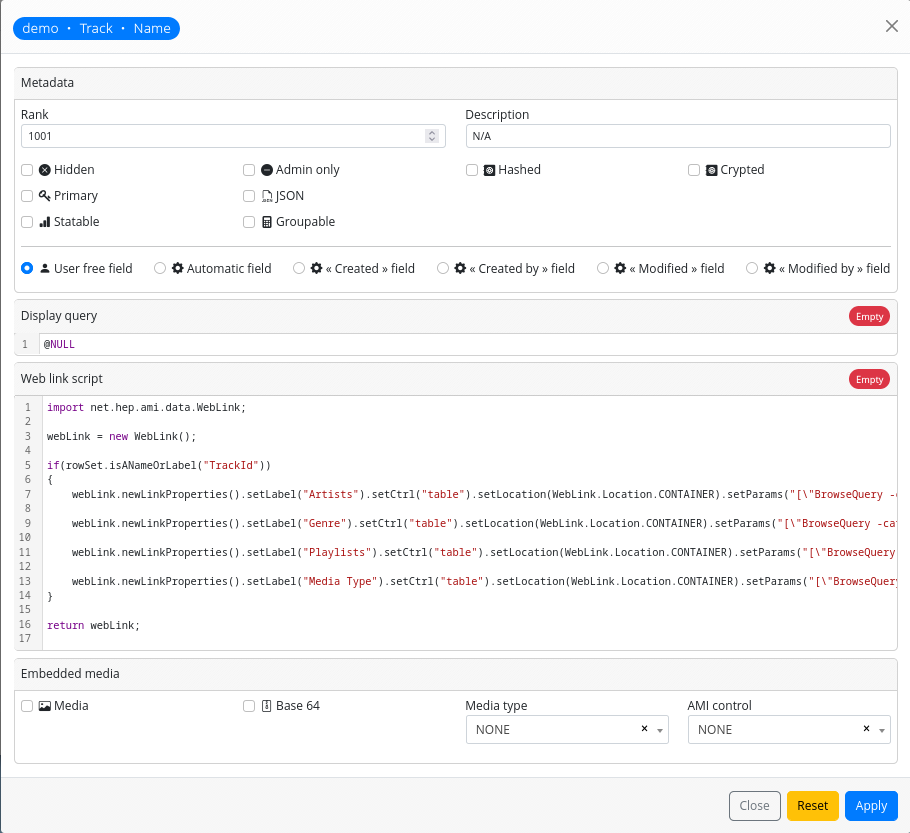
Figure 5. Entity field options
The field options are:
-
Metadata: Field’s metadata options
-
rank: This numerical value represents the “rank” of the entity field. It plays a crucial role in determining how the data will appear in an end-user’s search result table. The smaller the number, the further to the left the corresponding column will appear in the result table, making it the first in the usual reading direction.
-
description_: A text description of the field.
-
Hidden: When checked, this option makes the field to be hidden in search result.
-
Admin only: When checked, his option makes the field to be shown only to administrators in search result.
-
Hashed: When checked, this option makes the AMI ecosystem that the values of this field are hash.
-
Crypted: When checked, this option informs the AMI ecosystem that the values of this field are encrypted using the key defined during ecosystem installation. This allows decrypted values to be displayed only to administrators in search results.
-
Primary: When checked, this option informs the AMI ecosystem that the field is a primary key of the corresponding database table. However, this should be automatically detected by the ecosystem.
-
JSON_: When checked, this option informs the AMI ecosystem that the field corresponds to a JSON field in the database.
-
Statable: When checked, this option informs the AMI ecosystem that statistics can be computed on the stored values for this field. It enables end-users to see, at the top of the column in the search result table, a mini-tool (with the same icon as the one near the check box) to display statistics computed over all the search selections.
-
Groupable: When checked, this option informs the AMI ecosystem that results for this field can be grouped by values. It enables end-users to see, at the top of the column in the search result table, a mini-tool (with the same icon as the one near the check box) to group results by the value of this field.
-
-
Display query: Experimental. Do not use yet.
-
Web link script: This is a text area where an administrator can write Groovy scripts to modify or enhance the way values are displayed to end-users.
- Colorisation: The script can be used to apply colorization to field values in the search result table, depending on the value.
import net.hep.ami.data.WebLink;

 webLink = new WebLink();

 if(rowSet.isANameOrLabel("UnitPrice"))
 {
  if(Double.parseDouble(row.getValue("UnitPrice")) >= 1)
  {
   webLink.setClass("badge badge-danger bg-danger w-100 d-block");
  }
  else
  {
   webLink.setClass("badge badge-success bg-success w-100 d-block");
  }
 }

return webLink;- Unit editor: The script can be used to enrich field values with a “unit editor” control, allowing the display of human-readable values with units.
import net.hep.ami.data.WebLink;

 webLink = new WebLink().setUnitName("s")
                        .setUnitFactor("m")
                        .setUnitBase("1000")
                        .setHumanReadable("true");

return webLink;- Web links: Links to other entity records can be inserted under the value in the search result, facilitating links to external information or other entities using ecosystem controls.
import net.hep.ami.data.WebLink;

webLink = new WebLink();

if(rowSet.isANameOrLabel("TrackId"))
{
webLink.newLinkProperties()
       .setLabel("Artists")
       .setCtrl("table")
       .setLocation(WebLink.Location.CONTAINER)
       .setParams("["BrowseQuery -catalog=\"demo\" -entity=\"Artist\" -mql=\"SELECT * WHERE Track.TrackId='"
       + row.getValue("TrackId") + "'\""]")
       .setSettings("{"catalog":"demo", "entity":"Artist"}").setIcon("table").setTitle("Artists");

webLink.newLinkProperties()
       .setLabel("Genre")
       .setCtrl("table")
       .setLocation(WebLink.Location.CONTAINER)
       .setParams("["BrowseQuery -catalog=\"demo\" -entity=\"Genre\" -mql=\"SELECT * WHERE Track.TrackId='"
       + row.getValue("TrackId") + "'\""]")
       .setSettings("{"catalog":"demo", "entity":"Genre"}").setIcon("table").setTitle("Genre");

webLink.newLinkProperties()
       .setLabel("Playlists")
       .setCtrl("table")
       .setLocation(WebLink.Location.CONTAINER)
       .setParams("["BrowseQuery -catalog=\"demo\" -entity=\"Playlist\" -mql=\"SELECT * WHERE Track.TrackId='"
       + row.getValue("TrackId") + "'\""]")
       .setSettings("{"catalog":"demo", "entity":"Playlist"}").setIcon("table").setTitle("Playlists");

webLink.newLinkProperties()
       .setLabel("Media Type")
       .setCtrl("table").setLocation(WebLink.Location.CONTAINER)
       .setParams("["BrowseQuery -catalog=\"demo\" -entity=\"MediaType\" -mql=\"SELECT * WHERE Track.TrackId='"
       + row.getValue("TrackId") + "'\""]")
       .setSettings("{"catalog":"demo", "entity":"MediaType"}")
       .setIcon("table")
       .setTitle("Media Type");
 }

return webLink;- Embedded media:
This option applies to fields where values consist of embedded media, such as video, audio, images, or zip archives. An administrator can configure how these media elements will be displayed to end-users. The available options are as follows:
- Media: A checkbox to indicate that the field corresponds to special media that needs to be interpreted.
- Base 64: A checkbox to indicate that the media is encoded in base 64.
- Media type: A dropdown list with various media types; select the one that corresponds to your media.
- AMI control: Specifies the AMI ecosystem control that must be used to display the media to end-users.
Browsing data of a given entity
To check the configuration of an entity and its fields, an administrator can click on the lens icon located at the top left of an entity box. This action will open a table component displaying all the values of an entity record, which is the same view that end-users will obtain when performing a search, as shown in Figure 6.
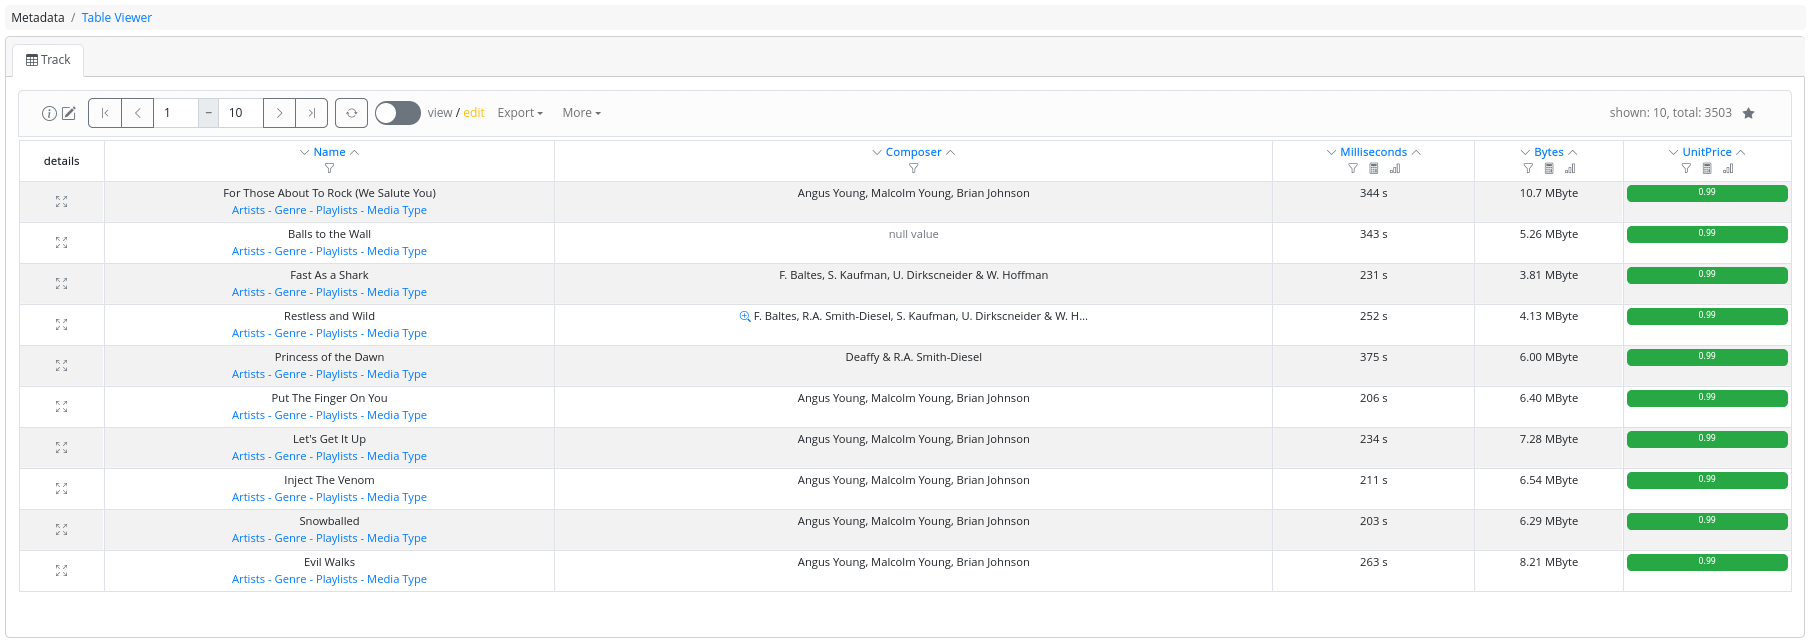
Figure 6. Checking configuration
Depending on the chosen options, mini-tools may appear under field names, record values may be colorized, or they may be displayed using the unit editor. Additionally, web links may appear under some values.
- Next
- The search modeler